

Ce module Wordpress vous permet d’installer plusieurs plateformes de paiement sur WooCommerce en un seul module – version Monosite.
99,00 €
Ce plugin WordPress ajoute à votre boutique WooCommerce les terminaux de paiements des principales banques utilisées en France :
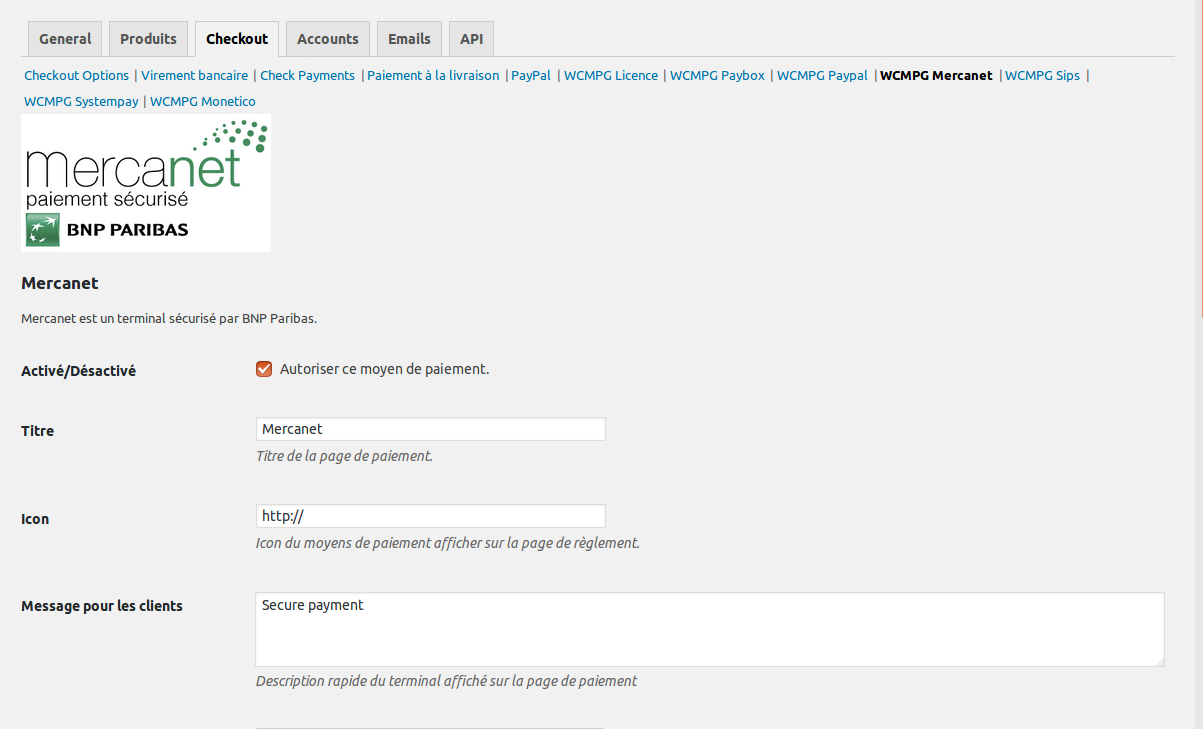
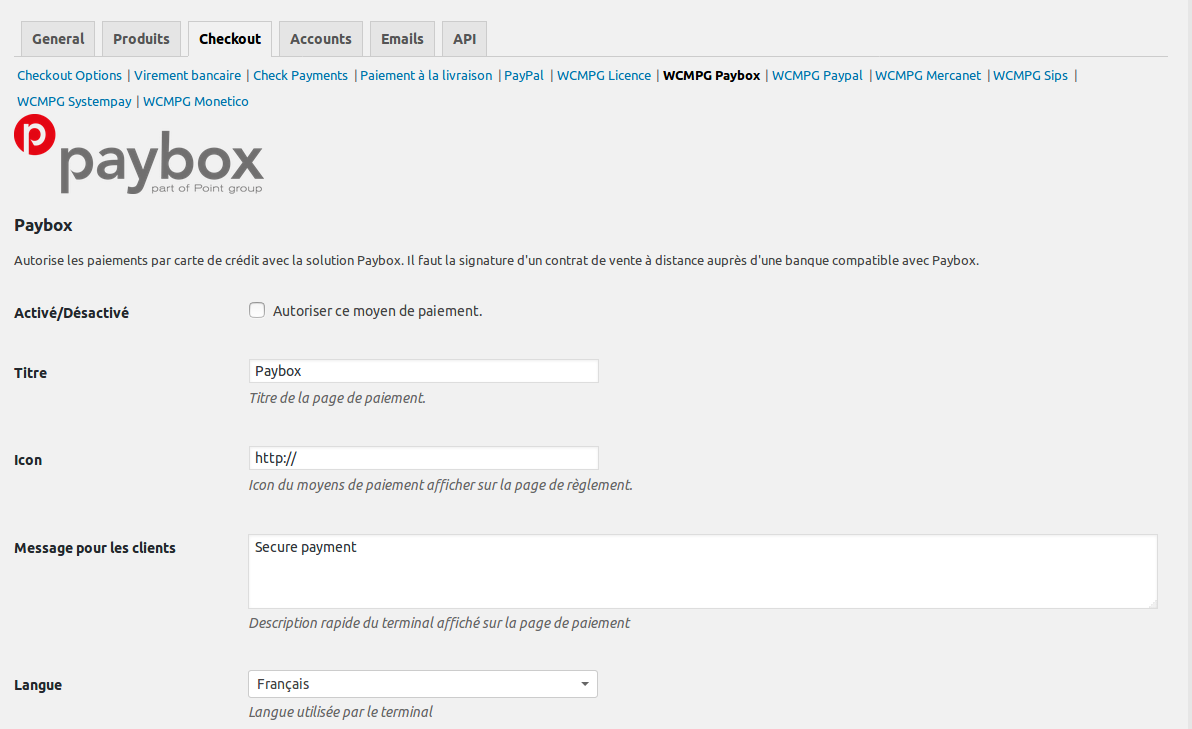
Vous devez souscrire au préalable un contrat de vente à distance auprès de votre banque, vous recevrez alors les paramètres de votre boutique qu’il vous suffira de configurer dans le plugin.
Grâce à ce plugin vous n’aurez pas à tout réinstaller ou racheter un autre plugin si vous changez de banque.
IMPORTANT : WCMPG et IRCF ne sont pas affiliées aux banques citées ci-dessus.
Télécharger la version gratuite (Paypal + Paybox)
| License installation and activation | 1. In your WordPress administration website (https://websitename/wp-admin) > Extensions > Add > Search = wcmpg > click the "Download" button. 2. In your WordPress administration website > WooCommerce > Settings > Payment > WCMPG License > Enter your license number then save.You should see the message "License number activated", you may have to repeat the process multiple for the number to get activated. |
|---|---|
| WCMPG Paypal | – To generate your live login: https://www.paypal.com/businessprofile/mytools/apiaccess |
| WCMPG Monetico | 1. Go to the website https://www.monetico-services.com/ > Advanced settings > Security key, then ask to receive your secret key, a code will be sent to your email, enter the code, the website will then show the secret key that you can copy/paste for the next step. 2. In the WordPress admin dashboard > WooCommerce > Settings > Payment > WCMPG Monetico 3. Send the automatic payment URL copied in the previous step to the Monetico support by email. When Monetico support set up the automatic return URL, proceed with the payment test: go to the shop, add a product to the basket, order, and choose the Monetico payment method. When you land on the credit card form, click on one of the credit card logos to display a test credit card number. Perform a denied test and an approved test with failed 3DS and finally a successful test payment (each test corresponds to a different test card number). 4. When all the tests are successful deploy your POS in production in the Monetico back-office AND in the Monetico WCMPG settings then do a final test in production mode, check if the order status is updated as well. If you encounter any issues check the "Debugging" section below. |
| WCMPG SIPS | 1. To configure the POS SIPS, beforehand you first need to obtain your SIPS kit in ZIP format, your kit has to contain the following elements : sample/ In some versions of the kit, the bin folder has sub files with many request and response versions. If you're missing any files, unzip the kit, add the files, then recreate the ZIP file. 2. When the SIPS kit is ready, go to your website WordPress > WooCommerce > Settings > Payment > WCMPG SIPS The most common issues are: 3. When the kit is finally downloaded and tested successfully, go to your shop and do the payment test with a real credit card number (the payment will not be processed as long as your certificate is not in production), go back to the SIPS WCMPG then copy/paste the automatic return URL displayed at the bottom of the screen, send the automatic return URL to the SIPS/ATOS support by email( you only need to send the production URL). This URL allows the bank to update the order status on WordPress when it is paid. Only when the order changes to the paid status will you receive the order email. The notification URL is called by SIPS only in production, you cannot test the notification URL in pre-production (SIPS limitation). 4. Send the fax for the production setup request of the POS, specify the payment test number that you did as well as the date, the amount, and the production date that you wish for (allow a delay of 2 business days and don't do it on a Friday) 5.When the POS is in production, perform a real payment to ensure the proper operation of the notification URL and the order status change. You can refund your payment in SIPS/ATOS back office. |
| WCMPG Systempay | 1. Log in to the Systempay back office > Settings > Notification rules > notification URL at the end of the payment > notification URL of the V1, V2 form API : 2. Log in to the Systempay back office> Settings > Shop > Copy the test secret key and paste it in the WCMPG Systempay settings, select the "Test" mode and save. Check if the selected algorithm (SHA-1 ou HMAC-SHA-256) corresponds to the one displayed in your Systempay back office. 3. On the website, do multiple test payments by clicking on the small card each time to fill the card form with a test number 4. When all the tests are done, check in the Systempay back office that the 4 card numbers are checked, then you can click on the button to generate a secret key for production.Copy-paste the production secret key and switch to production mode in WCMPG Systempay. 5. Redo a final test in production to ensure that the payment call works well and if possible do a real payment to check if the order with the status "Waiting" becomes "In progress" (= bought) in WooCommerce, you will also receive the checkout emails in WooCommerce. |
| Debugging | To diagnose your problem, you can temporarily activate the logs in the wp-config.php file: If the issue is still unresolved, send the FTP access and WordPress administrator to technique@ircf.fr while describing your issue. |